Showing posts with label home projects. Show all posts

Freshman Finale

My oldest daughter is moving off campus with some friends next semester. Since they will pay rent year round, we actually got to move her into her new bedroom last weekend.

For the last couple months, I've been gathering used furniture and giving it a makeover for her new place. As I've sanded and painted, I've done it with love. Preparing and planning these things is a way to provide and protect her at an age when parenting is no longer very hands on. Hanging decorations and curtains, making the bed, finding ways to make her as comfortable as possible makes me feel like I'm caring for her from afar.


When we arrived her things were piled around the room and she had been sleeping on an air mattress for a few nights. It didn't feel like a place you'd want to hang out. But by the time we left, she was looking forward to sleeping there!


It's amazing how much different I felt moving her into this room than I did her dorm room just last fall. There were so many unknowns dropping her off at college for the first time. So many emotions ending one stage and beginning another. This time I only felt excitement and happiness that she's doing well in school and is enjoying her life there. She's making good decisions and I see her growing up in ways that make me proud.


I can't believe her freshman year is over already. I'm looking forward to having her home for the summer and am excited to see what her sophomore year holds in the fall! 


Inspiration for Your Home

Looking for a great read in the new year? I got The Nesting Place by Myquillyn Smith for Christmas and I love it! 


With her relaxed approach to decorating, it was just the book to lift me out of the after-Christmas malaise and inspire me to do some projects. Here's a before and after of one I finished last night!


I had bought this little end table for $15 a couple weeks ago. After reading, I couldn't wait to get my paintbrush out and play around. I just set up the supplies in my living room and started having fun!

Best reminders from the book...

Don't be afraid to make a mistake. Doing something, even if it doesn't end up working, is better than living with something you don't like. 

Decorating doesn't have to be expensive. In fact, getting creative with what you have, or working with a small budget can be very satisfying!

Do what you like. You don't have to follow someone else's rules. 

And of course, it doesn't have to be perfect to be beautiful. This is the tag line of the title and it's a message woven throughout the book. I think it fits in perfectly with my New Year's resolution!


Have any of you read The Nesting Place? Let me know if you end up checking it out. I'd love to hear what you think!


Picking Paint Colors

I can't pull in a paint store parking lot without getting excited. Actually walking in the store makes me giddy. Oh the possibilities! The colors. The choices.

It's a swift fall to despair though. The colors. The choices. How do you choose?

I'm always optimistic as I walk up to counter thinking of the transformation my room is about to undergo. Sometimes I'm lucky and the first color is a winner. Sometimes I have to make a few trips back. 

A couple weeks ago, I started painting my hallways. They'd been the same color for ten years and I couldn't stand it anymore.

before

after

Now that I've finished most of them, I'm still not sure about the color. It's the same color as the kitchen, Benjamin Moore's Classic Gray. It's very neutral and doesn't shout anything at me when I walk by. On the other hand, it's a bit too plain blending right in with the white trim. We have painters coming in January to do an area on the stairwell that's too high for me to handle. I could have them do a completely different color and then repaint the other areas myself.

Any thoughts? Should I venture back into the world of paint samples? What's your record number of times for painting a single area? :)


Storage Ideas for Small Spaces

Well, we did it! College drop off is complete. My daughter's dorm room is decorated and classes started today, so the very first fall semester is officially underway. One of the things I was looking forward to on move in day was decorating the dorm room. We had fun looking for ideas to increase storage in a tiny space. One of best ideas we found was making these little seats out of milk crates. Not only do they provide extra storage and a place for friends to sit, but they also fit neatly under her bed.


I saw the idea for these here. They're pretty self explanatory from the picture. All that was required was milk crates, plywood, quilt batting, material, and a staple gun. After cutting the plywood to fit the the top of the crate, you staple batting and material around it to create a cushioned seat. The tops then lift out for quick access to whatever you choose to store inside.

After I put these together, I used the extra material to decorate one of these plastic drawer units. Using a hot glue gun, I attached material to each of the inside front panels. Now she can put whatever she wants in there and no one can see the contents from the outside. My younger daughters liked both of these projects so much they want me to make the same things for their room!


Just for fun, here was our view of the dorm room when we first walked in.


I couldn't help feeling it had the air of a prison cell. This is her side looking in from the doorway. Two desks face each other and serve to divide the room. 

And here is an after picture. Much better!


I really enjoyed working in a small space trying to make it as functional as possible. On the way home, my husband was bemoaning the fact that we might end up setting up dorm rooms twenty times. I told him I look forward to it. That's totally the fun part! It's the hauling it all back home for the summer and having it take over my dining room again that I dread! :)

Oil Painting

A couple months ago, I wrote here about hobbies and how much they enrich my life. One hobby I get a great deal of pleasure from is painting. I've always liked creating art. There's something about getting lost in the process that's very relaxing and satisfying to me. A realtor friend recently asked me to paint a house he had sold so he could give it as a gift to the former homeowner.

The original picture.

The painting was 5x7 and took me between five and six hours to completely finish. That sounds like a long time and others may be able to do it faster, but that's pretty typical for me. I thought it might be fun to show you the progression of something like this. I can't paint an oil painting in one day because some layers need to dry before I can paint more detail over them. Here is the painting in stages:

The initial sketch.

At the end of the first session.

End of the second session.


End of third session.

Framed and ready to go!

I really enjoy painting houses. Each one is unique and has its own story. This week we're traveling in New England and one of the things I'm looking forward to is looking at the houses. They have a different style and architecture than I'm used to seeing in Tennessee. I'm sure I'll be taking lots of pictures and will paint at least one as a memory of our trip!

How about you? Do you have hobbies that you enjoy? I'd love to hear about them!


Got Zucchini?


It's summer and the zucchini is ripe and ready! I don't have a garden, but I've been getting some fresh zucchini from my parents and my mother-in-law. Maybe you've been getting some from a gardening relative or friend, too. If you're like me, and end up with more than you can eat in its natural state, then you might consider making some delicious zucchini bread.

Today I'm going to share the Betty Crocker recipe I've been using to make zucchini bread for almost 20 years! I'll include a link to this recipe at the end of my post, but first I'd like to share a few changes to make the bread more healthy and moist.

If you've never made zucchini bread, you may not realize how simple it is to get the zucchini ready to use. Begin by washing and drying the outside of your zucchini. Then, cut the tips off either end and shred the rest into a bowl using an ordinary cheese grater. This recipe requires three cups of zucchini and makes two loaves.


Because I like to make four loaves at a time, I grate six cups of zucchini. If I have any extra, I put 3 cup amounts of grated zucchini in quart sized ziploc bags and store them in the freezer. Before using, I thaw these out for a day or two, draining the thawed zucchini in a colander before I put it in the batter.


A few tips to make the bread more healthy:

1. Use applesauce instead of vegetable oil. The Betty Crocker recipe calls for 2/3 cup vegetable oil, but I always use applesauce instead.

2. Use whole wheat flour. The recipe calls for 3 cups all-purpose or wheat flour. Definitely go with the whole wheat if you're looking to make this a healthier bread.

3. If you'd like to avoid cooking with eggs, you can substitute 1 Tbsp soy flour plus 1 Tbsp water for each egg.

4. Feel free to leave out the nuts and raisins. This recipe calls for chopped nuts and raisins, but my kids don't like them.

And one tip to make it more tasty!

4. Add one cup chocolate chips. This won't make the bread more healthy, but it will make it a sweeter treat! My son loves the bread this way and eats it up quickly!

The full Betty Crocker recipe can be found here.


I hope you'll be enjoying some of this fantastic bread soon!


DIY Mason Jar Terrariums

Yesterday, I went to our local farmer's market. It's so inspiring to see all the fresh fruits and vegetables and the gorgeous plants and flowers. It makes me wish I enjoyed gardening and could really throw myself into growing things! But alas, despite parents who love all kinds of gardening, I just can't get into it.

Here's something I did think I could grow though.


I like house plants and they require little in the way of actual work, so I thought maybe these terrariums would be fun to put together, too. I had several extra mason jars and two little girls at home that love a craft, so I made an impulsive decision and bought some supplies right then and there. 

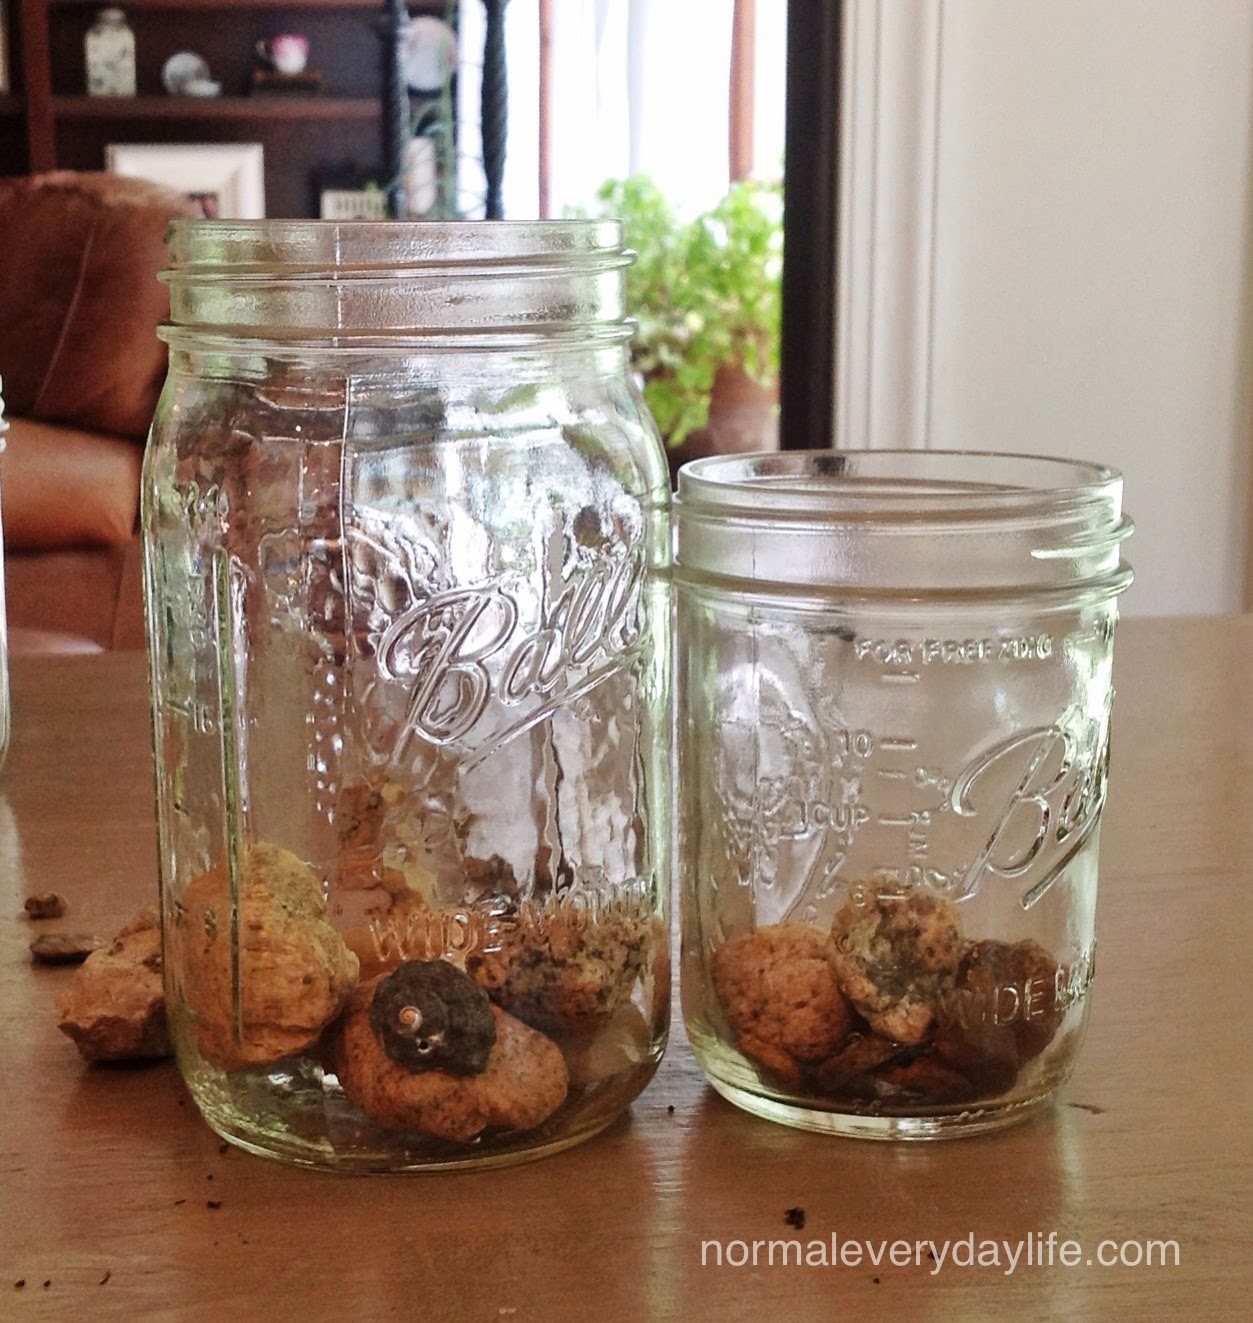
Of course, the twins were all in and we got our indoor gardening on as soon I as got back home. Here were the supplies: glass containers, rocks for drainage on the bottom of your container, potting soil, moss, and some succulents. 


These are very easy to put together. First, place a layer of rocks on the bottom of your container for drainage.


Then put in a layer of soil. Make a little hole in the soil and place the succulent in it.


Fill in with more soil and then some moss. You can also put little animals or figurines in the mix for fun! My daughter took a liking to this little rabbit.


The lady at the farmer's market said these plants require very little water, so I didn't add much. Terarriums can be either open or closed depending on the plants you're growing. Since succulents thrive in a dry, arid environment, I'm leaving mine open for now. 

As far as caring for a terrarium, I think less is more. You don't want it to have too much light or too much water. I can already see this may be a bit of a challenge for my girls since they think watering plants is the fun part! Hopefully the little succulents will survive all their "attention"!


Depending on the plants you choose, these little terrariums can be perfect for offices, dorm rooms, and other dimly lit areas because they don't need a lot of full sun and are very low maintenance. Certain types of enclosed terrariums can even be watered as little as once a month!


All in all, this was a fun little project that allowed us to play in the dirt and create something pretty. I think I just might enjoy container gardening!


My Husband Was Right

Sometimes I need to admit when I'm wrong and my husband is right. And he was right about this...


Steve had been wanting us to get the NutriBullet for awhile. He had talked to several people at work that had one and he wanted to make smoothies. I pictured a big mess I'd end up cleaning up and more trips to the grocery store as he liquified all the fruits and vegetables in the house. I put it off for as long as possible. The downfall was that he was out shopping with me and put one in the cart just to think about. Well, we all know that things that go in the cart rarely go back on the shelf.

But guess who's ended up really liking it?!? Yours, truly. You see, I've had a yogurt with my breakfast just about every morning for the past 20 years.


Boring...right? I mean I did just recently switch to Greek to mix it up, but still. Who wouldn't rather have this?


Yum! Now I just put my yogurt, a little bit of milk, a few strawberries, and some ice in the NutriBullet and voila...it's a new and interesting concoction that's good for me, too!


Seriously, this is tasty. 

There are a lot of other combinations/recipes you can make, too. Steve has put kale, apples, carrots, grapes, avocado, orange juice, and more in his smoothies and is loving them!

So today I stand corrected. I really do like the smoothie machine and it hasn't turned out to be as messy as I thought. And Steve is even going to grocery store for fruits and vegetables more often, so everyone wins!

How about you? Has your husband been right about anything lately? You can admit it here and it'll be our little secret!


Freshening Up the Garage

Last week we hired some painters to repair several areas of drywall damage and repaint our garage walls and ceiling. Even the doors and windows!  Cue the cheering!! If you're thinking what's the big deal about a garage, then let me tell you a little secret. When I walk by homes with neatly organized, clean garages, I experience what I'll frankly call ENVY. Bikes standing or hanging nicely, sporting equipment contained in appropriate containers, shoes stacked by the door, it all calls to me so temptingly. I'm drawn to it like a moth to a flame, imagining that if that area is clean and neat, the inside of the house must be awesome.

For this project we had to move everything into the middle of the garage and then start from scratch putting it all back. We got rid of anything that didn't serve a purpose. I think we had moved some things in ten years ago and never touched them again. Our paint collection had definitely gotten out of hand. Old shoes, electrical and plumbing supplies we were saving for a rainy day, a filing cabinet, extra dry wall and plywood, and more miscellaneous junk than I want to admit, finally moved out!

Here are some pictures taken right after the painters left...


Is it weird that I was excited to arrange things on this wall of shelves?


I even told my husband several times not to start without me. (No worries there!) A side note on the garbage can...If you're a mom without a "circular file" next to your vehicle, you're missing out. It really cuts down on the number of papers, "art" projects, little toys, etc. that would otherwise make their way into your house to drive you insane. It's even become a family joke over the years. My kids know if it makes it past that garbage can, ahem, circular file, it must be something pretty special!

Back to garage organization...You can really go wild buying things to organize the garage, but since we had a wall of built-in shelves and several free standing units, I thought we'd be fine. I did buy this 4 foot long folding table to sit just outside the door to the kitchen.


Both my boys play lacrosse so I can store their gear under it instead of right in the middle of the floor. Flat spaces are prime real estate in our house, so I'm sure this table top will be heavily used. Is it crazy that I'm looking forward to deciding just what I'd like to hang on these empty hooks? Tell me I'm not the only one who gets a little giddy at filling empty hooks and shelves. I'm thinking that pool bags and towels will be the first things that get hung up here as swim season is only a month away.


I'm not naive enough to think we'll always keep it this organized, but a girl can dream, can't she? And no matter what, it's a vast improvement over this obstacle course I documented in Missing the Messes!


So now that you know about my secret garage envy, it's time to spill your guts. Is there a space that you see in other people's homes that always brings out your little green monster?


Two Simple Easter Centerpieces

I'm not one to do a lot of seasonal or holiday decorating. However, the projects I'm going to show you today meet all my criteria: easy, inexpensive, and don't require much storage. I've seen several types of these on Pinterest, but there wasn't one particular tutorial that I followed. In addition to items I already had on hand, I picked up these Dollar Tree supplies. Three packages of fake grass/moss and three packages of sidewalk chalk in the shape of Easter eggs. I was going to dye Easter eggs, but these chalk eggs came in such pretty pastels and they look authentic.


Project number one...


I have this terrarium-like container on my dining room table throughout the year. Most of the time, it holds candles, but at Christmas I fill it with colorful ornaments. After I spread the grass/moss mixture around the bottom, I placed a few of the chalk eggs and some smaller jelly beans around the area. Two brown ceramic bunnies are in the middle of the Easter egg hunt. If you don't have any ceramic rabbits, I've seen chocolate bunnies used instead. 

Here it is from the side..


The second project is similar except I used a glass jar that sits on my kitchen table. When making this, I used the same method as above, but I used only one bunny and one chalk egg, along with the jelly beans.


I like how proud he looks in the jar. After Easter, I'm going to continue to use the moss, but replace the bunny and eggs with a bird my grandfather carved. I love it when I can get multiple uses out of the same things! 

Are you a holiday decorator that goes all out or do you tend to do the minimum like me? Anyone boycott seasonal decorations altogether? 


Picture Ledges

Today I want to share some picture ledges my husband and I made using Carissa's tutorial on the Brown Eyed Fox. When I saw her ledges, I knew they would be perfect for this wall as you enter our kitchen from the garage.


Because this is a small space, we chose to make our ledges a little more narrow than Carissa's. To make each of these, we used 1x3's for the back and bottom of each ledge and 1x2's for the front. The shelves are made from red oak and are about 5 feet long. I painted each board white before we built them and then put a final coat on each ledge after it was on the wall. Here is a good look at the shelves from the side. We nailed our ledges together and then screwed the finished product directly into the studs in the wall.


Attaching them directly to the studs doesn't leave room for error, but it makes them very sturdy. Fortunately, my husband was in charge of the measuring and they came out level on the first try!


What do you think? I love the way you can layer the frames and change the pictures around at any time without making any new nail holes! 


Lighter, Brighter Kitchen

I've blogged a couple times now, here and here, about getting rid of the wallpaper in our kitchen and painting the walls a new color. Well, it's done and I finished in time for spring break! I may have spent every spare minute painting and strained muscles I didn't know I had, but that yellow gold color is out of here!

Let's do really bad before pictures, just like in the weight loss ads, so that when I show you the final result, you'll be more in awe. Here's one that really showcases the color and my housekeeping skills in a great way.


How about a couple from when the kitchen looked even more like a war zone?!?


Okay, now let me show you what a lighter color and some deep cleaning can do in your average, run of the mill kitchen. Disclaimer: I am not a designer with beautiful photography and a plethora of styling products, so you too can do this at home. 


Pretty different, huh? I ended up going with Benjamin Moore Classic Gray on the walls. It's a little lighter than I had hoped for, but I can always paint again in six months after I forget what a pain it was this time.

How about you? Are you trying to finish up any projects before spring break? Are you like me, full of energy before the project starts and then crawling across the finish line at the end?!?